Join me this week to downsize and minimalize the amount of kids toys around the house. Tips:
When working with a child to declutter toys, let him/her know about all places they can donate to kids in need, such as to homeless shelters and toy drives. Pick a place to donate together and follow through with it. If not sure where to donate locally, ask the neighbors at nextdoor.com
Tackle clutter with the kids for as long as their attention can be held, they are having fun, and being productive with you.
Kids get overwhelmed by choice. Allow them to make decisions on what to keep and what to donate for only a few things at a time. When their interest starts to wane…
Set them free! Don’t get frustrated. It’s up to you, their mom/dad/guardian/caretaker, to continue sorting, decluttering, and putting things away.
Tackle kids clutter every few months. Declutter a little at a time together and instill great habits in everyone. Do not give up. Their clutter is your clutter. Set a regular schedule, find balance with the amount of stuff you are willing buy/accept/store/donate, and turn challenges into successes.
Isabella Guajardo, founder and owner of Bella Organizing, is a San Francisco Bay Area professional organizer offering home organizing, interior redesign, and residential move management services throughout the Greater San Francisco Bay Area. Call (510) 229-7321 or email info@bellaorganizing.com for more information. Gift certificates are available.
There are valuable memories worth saving, and a lot of bad shots taking up valuable space. Paper photos quickly become clutter stuffed into boxes and drawers if not organized into albums. Digital photos (and video) take up space on computers and smart phones, and make devices run slower unless you back them up externally and delete them from your device. Minimalize paper and digital photo clutter in your home and on your computer by taking these steps.
With the passing of time, you develop a fresh perspective of what photos look good and do not, and what you want and don’t want to keep. This week’s focus is to 1) purge unwanted photos, and 2) take steps to organize the keepers.
Start at the beginning. Look through the photos from the beginning of the digital history on your smart phone or computer, or grab a handful of loose photos and start sorting through them (handle carefully or wear clean gloves to avoid getting dirt and fingerprints on them).
Purge and delete. Here is a list of photos worth downsizing:
blurry shots
bad composition
dark lighting
duplicates (multiple shots of the same pose or facial expression)
scenic pictures of which you no longer recall the location
photos of people, places, or things you no longer care to remember
Downsize first, organizing next. If you have a lot of digital photos to go through, focus on purging first, then put detailed labeling into albums and individual photos later, or else you may become overwhelmed. Deal with paper photos similarly, placing the keepers in stacks according to a general date or event. If you plan to scan them, purge and organize first, digitize later.
Mark favorites. Many digital photo storage programs (such as iPhoto) have an option to “star” or mark favorites. Do this as you go (and as you take photos in the future) so that you can find them faster at a later date. You can also mark favorites to print or email. If marking paper photos, use a post-it note or separate envelope to sort and label favorites.
Store photos safely now and forever.
Create one main folder labeled “Photos” on your smart phone or computer (the Mothership). This is where all your photo albums/sub-categories are kept. Your phone or computer may already come installed with a photo organizing application or program. Take advantage of it! From here it will be easy to organize, label, find, and back up photos.
Create new albums as you take new photos, or file new photos in existing albums. Albums I have in my phone and computer are “Friends” “Family” “Fig and Newton” (my dogs) “Home & Garden” “Bella Organizing” (work-related), and various labels according to the event.
Use acid free photo boxes or photo albums for paper photos. If an acidic product comes into contact with photos or paper, the acid can migrate and cause permanent damage and decay to your valuables more quickly than they would naturally. This is why it is important to use good quality Acid Free and archival materials for the preservation of treasured memories.
Use an SD card or thumb drive to transfer smaller batches of photos to safer digital storage. I don’t suggest saving photos using these small devices, as they can easily become too many storage places, and get lost. Use SD cards and thumb drives to transfer photos from one device or computer to another quickly, with the goal of getting photos to the Mothership for safekeeping.
Two moms are better than one. Send acopy of the photos on your computer to a larger, heavy-duty external hard drive. From the external hard drive, a third copy can be transferred to online/cloud storage (optional.)
Scan and save paper photos digitally on a cd that you can then upload to your computer, an external hard drive, and/or online (cloud) storage.Read Consumer Report for reviews of the latest desktop photo scanning machines. Mail away options are available for large batches of photos, some of which are listed here. Always read reviews and use local companies (don’t take a chance that your special memories will make it through customs in order to get a better deal from a foreign company.)
No storage system is 100% foolproof. Keep organized copies of your digital photos in 2-3 places AND paper back-ups of your most precious ones.
Photo Display Tips – see and use what you have
make a collage of framed photo memories on a wall or store in a digital photo frame that rotates and displays hundreds of photos at a time
Save favorite photos as phone or computer wall paper
Link photos of people to their information in your phone’s contact list
Companies like Costco offer less expensive and high quality transfer of home movies and slides to DVD, printing, mounting, photo repair, and album creation services.
Read 27 unique display ideas for paper and digital photos from Buzzfeed.
Isabella Guajardo, founder and owner of Bella Organizing, is a San Francisco Bay Area professional organizer offering home organizing, interior redesign, and residential move management services throughout the Greater San Francisco Bay Area. Call (510) 229-7321 or email info@bellaorganizing.com for more information. Gift certificates are available.
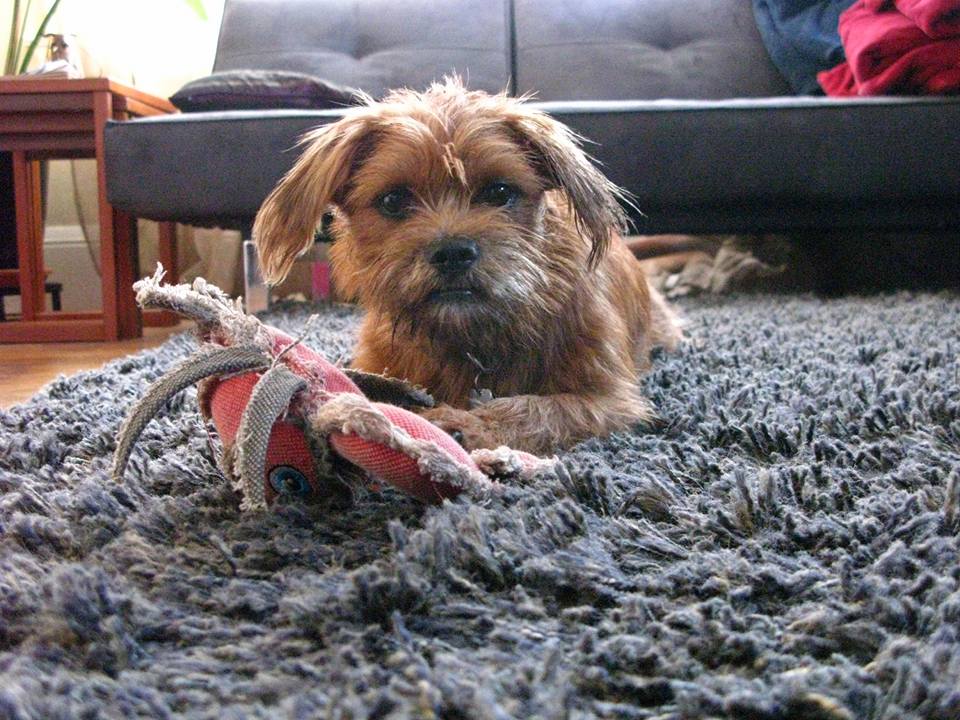
My boy Newton. He owns and loves but a few simple toy, but we have the most fun hiking together in the East Bay Regional Park hills.
Getting organized doesn’t happen overnight.
It’s a process or a “lifestyle change” that develops and improves over time. The more action you take toward an organized lifestyle, the more time you will have for family, friends, hobbies, life goals, and yourself. With faithful practice, you will become more organized. Here are six simple steps to get you started:
Pick a zone
Make a list
Sort like items
Give Away/Sell/Donate
Organize
Congratulate yourself
1. Pick a zone.
Choose a room or area of that room where with a little decluttering and organizing you will get instant gratification. Don’t try to tackle the entire garage or house in one day…stick with a SMALL area of one room, such as one small closet or cabinet. Focus on getting this area completely organized just the way you want it. The positive feeling of SUCCESS helps to keep us moving toward our goals.
2. Make a list.
Prioritize projects to complete within that zone before moving on to another (1., 2., 3., etc.). For example, if decluttering and organizing a pantry:
Pull out and compost old and expired food
Wipe down shelves with a cleaning solution
Arrange food into categories
Make a list of food that needs to be replaced and/or organizing supplies to pick up that will help streamline the pantry.
3. Sort like items.
Do you have multiples of something you prefer to store in this zone in different areas around the house? Bring them together. Don’t stray too far! Stick with organizing this zone. Finding things that don’t belong here? Put them in a pile and find them a home later or drop them off in the general area that *should* be their home and leave them there for now. You’ll fine tune later. Get back to sorting your priority zone. Do a little dusting while here.
4. Give Away/Sell/Donate.
Gather paper or plastic grocery or trash bags, cardboard Amazon or moving boxes, and label them accordingly for Give Away, Sell, and Donate. Fill them with things found in this zone that you want to bestow upon someone you know and love (Give Away), things you would like to make money back on (Sell) and things you don’t want that aren’t worth the time to sell but still have a little life in them (Donate). Place a Recycle and Trash bin or bag nearby, in case you come across this stuff in the process. #4 is an optional but very important step to de-cluttering and downsizing.
5. Organize.
Place items where it makes the most sense to you. Should everything in this zone be tidied up and left here or taken somewhere else in the house where it makes more sense to be? Did you find keys that should instead hang on a hook by the door, or go in a specific drawer in the kitchen? Did you happen upon a set of winter gloves that should go into a drawer in your dresser, or into each jacket pocket so they are instantly there when you need them? (I leave mine in my jackets and LOVE always finding them there.)
6. Congratulate yourself for coming this far.
Great job! You completed organizing a zone. Now set up a date with yourself to tackle another zone and add to the accomplishments.
Isabella Guajardo has provided professional home organizing and residential move management services to hundreds of individuals and families from all walks of life including single parents, school teachers, college professors, lawyers, doctors, Pulitzer Prize winners, and CEOs of Fortune 500 companies. The thing 90% of them have in common? Too much stuff they were ready to downsize. Bella Organizing helps you to tackle and reach your declutter and organizing goals.
Call (510) 229-7321 to schedule a complimentary telephone consultation.
Create a “drink zone” in the kitchen that includes everything you need to make your drinks: coffee, tea, various drink mixes, sugars, honey, mugs, glasses, coffee and tea maker, blender, juicer…
I LOVE when people move! Fresh start! I get to design, set up and organize home offices, living rooms, bedrooms, kitchens. I always have so many IDEAS.
The first thing that needs to be put together is the kitchen. Of course you have to eat and drink coffee and tea in the morning. I put together a series of photos of what I call a “drink zone” from the last home I lived in. I work with clients on kitchen organizing regularly, so these photos give examples of what I’m always talking about with them.
An organized drink zone is a place to store everything you need to make your favorite “for here” and “to go” drinks: coffee, tea, and their implements, cocoa, various drink mixes (such as emergen-c), sugars, honey, mugs, travel mugs, glasses, coffee and tea maker, blender, juicer, etc. Keep in the upper shelves things such as platters and baskets that you will use for serving drinks or drink-related tools and accessories.
Decanting & Labeling
Everyday drink glasses should be placed on the lowest, most reachable shelf, and less commonly used glasses up higher. Here I used a chrome expandable shelf riser/extender purchased from a local home store. The cabinet shelves are adjustable, so I adjusted the area to have enough space to add the extender so that the glasses stack and a hand can comfortably grab and put things away.
Lining kitchen cabinets is sometimes necessary. I like to line the lower, most commonly used dish cabinets. Why? Because it protects glasses from sliding around, from clanking and chipping on the cabinet, and it protects the cabinet from water damage if you put away things without completely wiping them dry. If you rent or are detailed about the resale value of your home, take care of the cabinets. One of my favorite’s is spongy no-slip liner because it’s easy to measure, cut, and place, unlike sticky liner. The brighter the liner color, the brighter it makes the inside of the cabinet, the easier it is to see what’s inside…works especially well in dark spaces.
Shelf liner protects the surface of your cabinets, adding to the resale value of your home.
We move up to the less-commonly used items…the wine and “special occasion” cocktail glasses. Alway have a small step-stool nearby for when it’s time to bring these babies down and par-tay.
Less commonly used glasses go higher up in the cabinet.
Love the tiki cocktail glasses.
We move over to the upper right where the coffee and travel mugs live. Six travel mugs is more than enough for two people.
Coffee and travel mugs.
Many moons ago I had a thrift store collection of cute mugs, but have since pared down to three: the skinny blue one with flowers that I love for hot chocolate, my little sombrero man, and my mama buzz mug. Mama Buzz was a hip local coffee and sandwich shop on Telegraph Avenue in the Temescal District of Oakland back when I first started this business. They were popular for showcasing local art & music before First Friday’s began. It’s since changed hands and is now a beer garden and bustling social hub during the First Fridays Art Murmur. Mama Buzz will forever live in my heart and kitchen cabinet.
My favorite mugs are simple treasures.
The lower-right side of the cabinet is where the coffee, tea, honey, sugar, mexican hot chocolate, mulling spices, emergen-c, coffee filters and drink implements live.
Coffee and tea drink zone.
I like to store loose leaf tea and bags in small, stack-able mason jars where they keep fresh longer and are easy to see. I simply cut the label off and place it in the jar so we can see and read what it is, and know when it’s time to buy more.
Store loose tea bags in mason jars to keep them fresh longer.
The counter top below is specifically for drink-related machines and gadgets: the electric water kettle and coffee maker. The large cabinet below the counter houses the juicer and blender which are too bulky and heavy to keep on the counter but used often enough to store nearby.
I keep mint with its roots in a glass of water by the sunlight to pick when I’m craving fresh tea. Mint is invasive in the garden, so pulling a little out at a time by the roots will keep them thinned. There’s no better tea than fresh mint tea.
Fresh mint ready for picking.
This is our kitchen drink zone. We add to it only when things break or run out, so that it doesn’t get cluttered. We keep in it things we love, cherish, and use regularly…things that make us happy when we open the cabinet and see them.
Kitchen cabinet organizing – drink station
Ready for more? Call (510) 229-7321 today to schedule a complimentary estimate for your kitchen and pantry organizing goals. Gift certificates are available.
When cold weather arrives, winter clothing and accessories need to be ready and within reach. Do you have a handful of tights, leggings, long socks, or thermal underwear you depend on for warmth and comfort this time of year? It’s easy for them to get lost and tangled, especially deep inside drawers. Here are simple steps to keep them together, organized, and accessible using hair ties or rubber bands. This idea works well for kids rooms and adults always on the go.
Step One
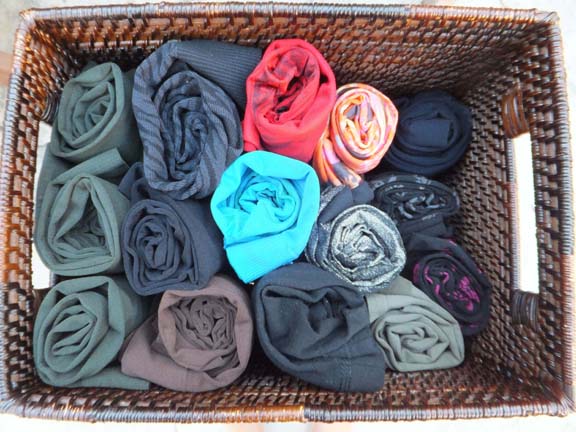
Gather and roll them up! Use a thick rubber band to keep in place. Extra hair ties and the thick rubber bands that hold fresh broccoli stalks together at the grocery store work great.
Step Two
Place the rolled and banded tights, leggings, or long socks upright in a drawer, basket or bin. I call this the “Cinnamon Roll.” In this view you see exactly what you have, how many, then pick and choose as you please without having to dig through a tangled and mis-matched mess. Rubber bands hold things together, so in the midst of the morning rush when changing your mind as to what color to wear, simply toss back what you don’t want without fear of unraveling…then grab another.
Step Three
As you grab to wear, toss the rubber bands back in to use again when laundry is done.
The fold and file method for thicker leggings and slim-fitting yoga pants.“Filing” folded clothes allows you to see everything you have in a glance.
____
Ready for more? Call (510) 229-7321 today to schedule a complimentary estimate for your wardrobe and accessory organizing goals. Gift certificates are available.

 Isabella Guajardo, founder and owner of Bella Organizing, is a San Francisco Bay Area professional organizer offering home organizing, interior redesign, and residential move management services throughout the Greater San Francisco Bay Area. Call (510) 229-7321 or email info@bellaorganizing.com for more information. Gift certificates are available.
 Start at the beginning. Look through the photos from the beginning of the digital history on your smart phone or computer, or grab a handful of loose photos and start sorting through them (handle carefully or wear clean gloves to avoid getting dirt and fingerprints on them).